
How to Install a 3D Water Vapor Electric Fireplace?
Installing a water vapor fireplace is simple and quick. AFIRE has designed 3D electric fireplaces with simple and intuitive controls, tailored to the needs and uses of modern consumers. This page is dedicated to providing you with tips, tricks, images, and videos to guide you step-by-step in the installation of your water vapor fireplace.
Tips for Installing a Steam Fireplace
- The preparation phase involves planning your project. This can include setting up a simple decorative fire space, installing a fireplace-TV combo, or undertaking more extensive renovation or improvement work. After this consideration, it is important to determine who will actually carry out the work. Hiring a professional decorator or an interior designer can be very helpful in implementing your project.
- Once this preparation phase is complete, install the device in the chosen space after connecting it with its adapter (see all details below). Then, fill the reservoir with tap water (or connect the device to the water supply). That's it, the installation is complete. You can now start the device and enjoy an extraordinary fire space!
- Important: Water vapor fireplaces must be installed indoors (except for models specifically designed for outdoor use), in standard residential conditions: ambient temperature between 10°C and 35°C (50°F to 95°F), moderate humidity, with no condensation or direct water exposure.
Installation tips: flame visibility and perception
Important note!
The perception of flames depends as much on the surrounding environment as on the fireplace itself.
In a very bright environment, with strong direct sunlight or intense lighting, the flame naturally becomes less visible.
Conversely, in a completely dark environment, the flame may appear excessively contrasted or visually amplified.
These effects are linked to fundamental principles of visual perception and are not specific to any particular technology: they occur in the same way with any decorative or functional flame.
Water vapor fireplaces are therefore designed to operate in a normal living environment, with a balanced level of ambient lighting — moderate natural light during the day or ambient lighting in the evening — in order to achieve the most natural and faithful flame rendering.
Importance of contrast and background
Flames are much more visible against a dark or black background.
This is a fundamental principle of visual perception: contrast allows the eye to clearly distinguish shape, movement, and flame intensity.
Stars or fireworks, for example, are far more visible at night for exactly the same reason.
For optimal flame perception, we strongly recommend:
- a deep dark background, ideally matte black (non-glossy and non-reflective),
- avoiding light, white, or reflective surfaces behind the flames,
- avoiding background colors that are close to the flame tones (for example: orange flames against light wood).
Any glossy or reflective surface placed behind the flame acts as backlighting: it reflects ambient light toward the viewer’s eye and visually weakens the flame effect.
This is why matte black backgrounds are systematically used in theaters, photography and video studios, as well as in high-end museum displays.
To go further on these fundamental principles:
Color vision – Wikipedia
Viewing angles and flame rendering
Beyond the background and the environment, flame perception also strongly depends on the viewing angle, particularly for open water vapor fireplaces.
The lighting system is designed to provide optimal rendering in front and rear viewing positions.
On these main faces, the angle is deliberately controlled to mask the light source: the LEDs only become visible in a top-down viewing angle, outside the normal field of vision.
On side views, however, it is not possible to reproduce this optical masking.
The observer is then positioned more directly in the axis of the LEDs, which explains why flame visibility is always better from the front and the rear than from the sides.
The designer’s recommendation
Experienced architects and designers take this optical constraint into account from the very early design stage of the project.
Whenever possible, they recommend limiting or masking lateral viewing angles in order to preserve flame rendering on the main viewing faces.
This can be achieved in several ways:
- by integrating lateral returns or architectural frames,
- by positioning fixed elements within the design (partitions, side panels, structural elements),
- by using niches, bookshelves or decorative features to naturally restrict lateral views.
This approach allows for an optimal flame rendering while maintaining a high level of creative and architectural freedom around the water vapor fireplace.
%
Easy to install
%
Simple to use
%
Easy to fuel using tap water
%
Constraints!
Why the appearance of the flames varies depending on the environment
The flames of a water vapor fireplace are composed of water vapor and light. Their visual outcome therefore depends directly on how this vapor behaves in the surrounding air, independently of the fireplace itself.
The most influential factor is the ambient humidity level.
In dry air, the vapor is absorbed and dispersed very quickly, which naturally reduces the perceived height and density of the flames (as can occur with air conditioning, for example).
In more humid conditions, the vapor remains suspended for longer, allowing the flames to appear fuller, more stable, and more present.
For this reason, a water vapor fireplace will naturally vary in appearance depending on the environment in which it is installed, in much the same way that ambient lighting influences flame perception. These variations are inherent to the technology and contribute to its ability to create different atmospheres depending on the space, the time of day, and the desired mood.
That said, these natural effects can be significantly moderated through the fireplace’s settings. By adjusting the height, the density, and the brightness of the flames, the visual outcome can be adapted to the actual conditions of the space, resulting in a coherent, controlled, and intentional ambiance.
Key points for installing a 3D water vapor electric fireplace
1. It’s All About Decor: How to Create a Stylish Fire Space?
How do you envision a fire point that meets your expectations and desires? With the 3D water vapor fireplace, this task becomes simple. However, the design of your fire space is crucial. AFIRE advises you to draw or have your project drawn. You can then visualize it and make any necessary modifications. Decorators, designers, interior architects, and professionals in fireplaces, construction, or renovation, as well as carpenters and kitchen fitters, are the most qualified artisans to advise you and install your fireplace.
Note that it is not necessary to create ventilation grids to install a 3D AFIRE water vapor fireplace. Indeed, the air intakes are located on the top of the fireplaces (patented AFIRE system).

2. How to set up a water vapor insert?
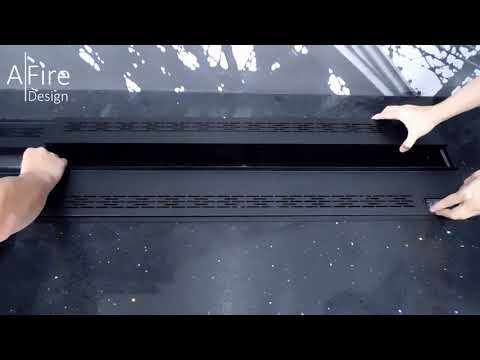
A hybrid fireplace runs only on water vapor and uses very little electricity. To install an AFIRE water vapor electric fireplace, you need to create a housing. You also need to think about an electric plug (it’s better to plan on it inside the housing). The system comes with a 100/240V (50-60 Hz) – 24V adapter. AFIRE automatically provides the right electrical connector for your country.
Just plug in the system and insert it into its housing. There is no need for aeration grids (AFIRE patented system).
⚠️ Air Drafts and Suction Effects: Installation Precautions
Be aware that the flames are very sensitive to air drafts.
In such cases, they must be protected using glass, plexiglass, polycarbonate, or any other suitable barrier.
The inside of the recess can remain open, but under no circumstances should it create a suction effect through the device. For example, an unsealed hole leading to another room (such as a basement, technical area, or a room with an open window) can cause an air draft that disrupts proper flame operation. Any opening inside the recess that leads to an uninsulated area or a space exposed to uncontrolled airflow must be properly sealed.
Installation methods


Installation tips: "NICHE" mounting
The minimum installation dimensions at the front of the device of 110 mm (ADVANCE range) and 165 mm (PRESTIGE range) are not mandatory.
The fireplace's LEDs project light upwards.
If you don't want to see any lights on the ceiling, you must respect these minimums.
There are no minimum dimensions to respect from the back of the appliance towards the wall.
3. How to fill and drain the water tank?
You can use tap water to fill the tank. It’s important that the water isn’t too hard. In this case, you can use a water softener or use bottled water.
No need to buy fuel!

It is possible to fill the water tank in three ways

Manual filling

Filling with integrated automatic pump

Connecting fireplace insert to the running water network
LITE & GATSBY ranges
Manual filling with integrated pump
(a connection to the water network is not necessary).
ADVANCE range
Manual filling (a connection to the water network is not necessary).
Manual filling with integrated pump (a connection to the water network is not necessary).
PRESTIGE & CLOUD ranges
Manual filling (a connection to the water network is not necessary).
Manual filling with integrated pump (a connection to the water network is not necessary).
Connecting fireplace insert to the running water network
Installation tips: water connection
The PRESTIGE and CLOUD series offer the possibility to connect the device to the water supply. Although the installation of this connection is not particularly complex, we strongly recommend seeking professional assistance to ensure optimal setup.
The initial step involves connecting to a water supply equipped with a shut-off valve. If your water supply is not in 1/4 inch, the use of a reducer is necessary. Ensure that the reducer matches the diameter of your water supply before transitioning to 1/4 inch. Then, connect the water supply with the reducer to the device using a 1/4-inch hose.
It is important to note that the reducer and the 1/4" tube are not included, as their size depends on the diameter of your water supply and the length required for the connection. We recommend acquiring these components based on your specific needs.
It is possible to drain the water tank in two ways

Manual drainage
AWA & AWPR Range - a connection to the water network is not necessary

Drainage with integrated automatic pump
AWPR Range - a connection to the water network is not necessary
Maintenance tips: drainage
ATTENTION! If you do not use your device for more than 7 days, drain it to avoid stagnant water.
Be careful, stagnant water can create particles that clog the level detectors and create water leaks!
For drainage, it is not necessary to connect to the wastewater network.
4. 3D water Vapor fireplace inserts with high-tech controls

Smart controls
App Smartphone
Dry contact for home automation
Remote control
On/off button


Download the AFIRE Smartphone App

Pairing your Smartphone to the water vapor fireplace insert

Pairing the remote control to the water vapor fireplace insert
Tip for controlling multiple devices with a single remote control
To control multiple devices with one remote control, follow these simple steps:
1- Press the On/OFF button of the first device for 5 seconds until it starts blinking.
2 - Repeat this process for the other units you want to control.
3 - When all units are blinking, press any button on the remote control you want to program.
4 - You will hear a beep from all devices, confirming successful programming.
5 - You can now control all your devices with this single convenient remote control!
This method will help simplify the management of your electronic devices and provide you with a smoother user experience.
5. Precautions for use and maintenance
📘 User Manual – AQUAFIRE Water Vapor Fireplaces
This comprehensive guide includes all essential instructions for proper use, maintenance, and optimal performance of your ventless water vapor fireplace.
Written by AFIRE’s technical team, it applies to all models in the LITE, ADVANCE, PRESTIGE ranges and beyond.
👉 View our User Manual – AQUAFIRE Water Vapor Fireplaces by AFIRE
Precaution of use
The device is equipped with LED lights. These lights will illuminate the flames, and they are also likely to illuminate the top of the unit.
Warning! Do not look at the source of light from above due to the risk of glare.
Maintenance
The steam fireplaces or water vapor fireplace inserts are equipped with mistmakers (ultrasound transducers). These are wear parts. They should be replaced every 2500-3500 hours. This operation is very simple (video). * Wear parts are not covered by the warranty. These are the Mist Makers (ultrasonic transducers), LEDs and the remote controls.
👉 Check out our dedicated page: How to maintain a water vapor fireplace or insert


Customer Service
Got a question, a doubt, or a technical issue? Our AFIRE experts support you throughout the life of your water vapor fireplace.
Remote diagnostics, replacement parts, video tutorials – our customer service is responsive, personalized, and designed to ensure peace of mind.